Docker Swarm cluster with docker-in-docker on MacOS
TL;DR
Docker-in-Docker dind can help you to run Docker Swarm cluster on your Macbook only with Docker for Mac (v1.12+). No
virtualbox,docker-machine,vagrantor other app is required.
The Beginning
One day, I’ve decided to try running Docker 1.12 Swarm cluster on my MacBook Pro. Docker team did a great job releasing Docker for Mac, and from that time I forgot all problems I used to have with boot2docker. I really like Docker for Mac: it’s fast, lightweight, tightly integrated with MacOS and significantly simplifies my life when working in changing network environment. The only missing thing is that it’s possible to create and work with single Docker daemon running inside xhyve VM. Shit! I want a cluster.
Of cause, it’s possible to create Swarm cluster with docker-machine tool, but it’s not MacOS friendly and requires to install additional VM software, like VirtualBox or Parallels (why? I already have xhyve!). I have different network for work office and home. At work I’m behind corporate proxy with multiple firewall filters. At home, of cause, life is better. docker-machine requires to create dedicated VMs for each environment and thus force me juggling with different shell scripts when I switch from one to another. It’s possible, but it’s not fun.
I just want to have multi-node Swarm cluster with Docker for Mac (and
xhyveVM). As simple as it is.
I’m a lazy person and if there is an already existing solution, I will alway choose one, even if it’s not ideal. So, after googling for a while, I’ve failed to find any suitable solution or blog post. So, I’ve decided to create my own and share it with you.
The Idea
The basic idea is to use Docker for Mac for running Swam master and several Docker-in-Docker containers for running Swarm worker nodes.
First, lets init our Swarm master:
# init Swarm master
docker swarm init
… keep Swarm join token:
# get join token
SWARM_TOKEN=$(docker swarm join-token -q worker)
… and Docker xhyve VM IP:
# get Swarm master IP (Docker for Mac xhyve VM IP)
SWARM_MASTER=$(docker info | grep -w 'Node Address' | awk '{print $3}')
… now let’s create 3 worker nodes and join these nodes to our cluster
# run NUM_WORKERS workers with SWARM_TOKEN
NUM_WORKERS=3
for i in $(seq “${NUM_WORKERS}"); do
  docker run -d --privileged --name worker-${i} --hostname=worker-${i} -p ${i}2375:2375 docker:1.12.1-dind
  docker --host=localhost:${i}2375 swarm join --token ${SWARM_TOKEN} ${SWARM_MASTER}:2377
done
Listing all our Swarm cluster nodes:
# list Swarm nodes :)
docker node ls
… you should see something like this:
ID                           HOSTNAME  STATUS  AVAILABILITY  MANAGER STATUS
1f6z8pioh3vuaz84gyp0biqt0    worker-2  Ready   Active
35z72o6zjhs9u1h99lrwzvx5n    worker-3  Ready   Active
d9ph5cmc604wp1vhhs754nnxx *  moby      Ready   Active        Leader
dj3gnpv86uqrw4b9mo9ux4jb5    worker-1  Ready   Active
That’s all folks! Now, you have running Swarm cluster on your Macbook and your Docker client is talking with Swarm master.
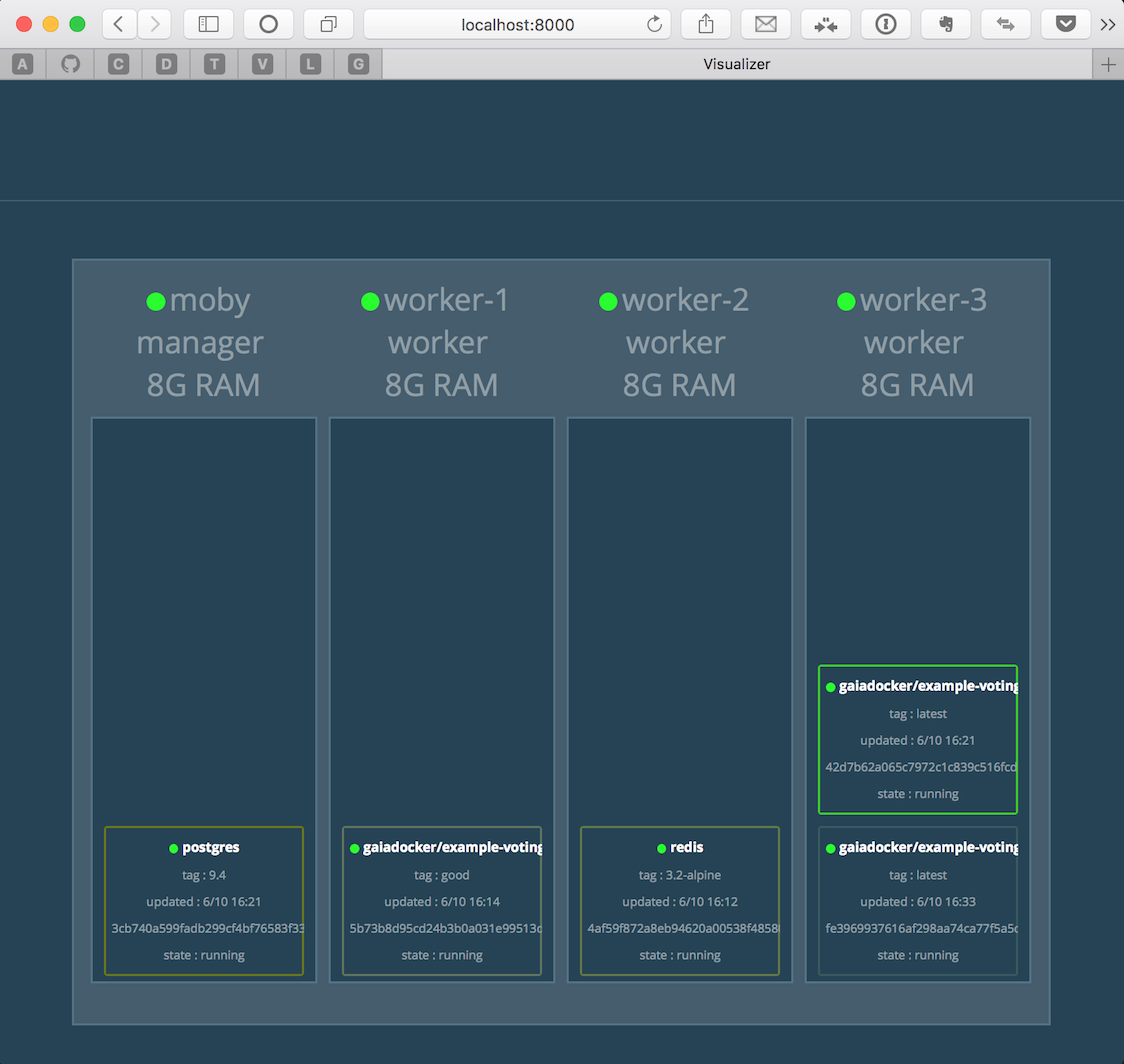
Nice tip:
You can use very nice [Swarm visualizer] (https://github.com/ManoMarks/docker-swarm-visualizer) by Mano Marks to see your Swarm cluster “in action”.
Run it with following command:
docker run -it -d -p 8000:8000 -e HOST=localhost -e PORT=8000 -v /var/run/docker.sock:/var/run/docker.sock manomarks/visualizer
And you should be able to see something like this (after you deploy some demo app):